
Introduction
Step 1

Whatever the subfloor surface you are laying on, all traces of old carpet, carpet gripping, nails or screws, old glue, dirt and grime must be removed completely.
Just like painting, spending timeproperly preparing the surface that will be under your planks will ensure your end result. Take the extra time at this stage to ensure that your installation comes up to the best possible
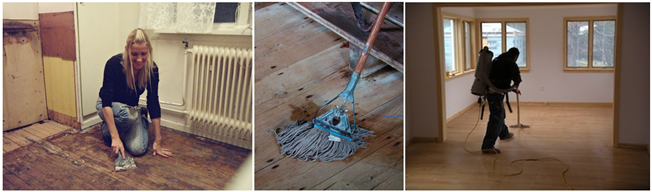
The floor surface should then be swept, mopped then vacuumed.
Fill any holes and seal the surface of your floor. This should be completed at this stage so you end up with the optimal fresh clean flat surface to begin your job.
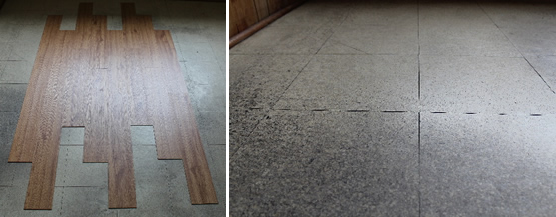
Laying new Vinyl CLICK & LOCK Planks over the top of old Ceramic Tiles.
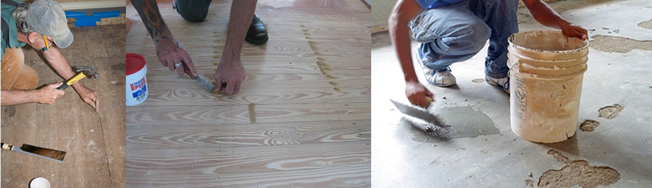
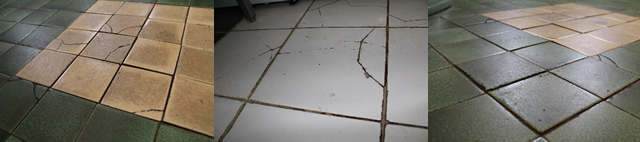
Vinyl CLICK & LOCK Planksmakes an easy way to recover your floors and freshen up a room. Often they can go right over the top of existing floors. In the case of ceramic tiles, it's essential to use a hammer and chisel to chip out any damaged or uneven tiles. These should then be filled in with levelling compound or mortar.
Laying new Vinyl CLICK & LOCK Planks over the top of old sheet Vinyl or old Vinyl Tiles.
Similar to laying over Ceramic tiles above, it is essential to remove any damaged tiles, infill any holes, and level the surface. Make sure you seal the old flooring to prepare it for levelling compound.
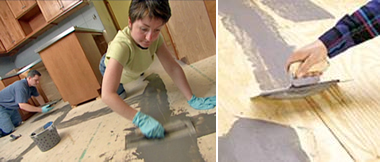
If there is any variance across your floor we recommend installing subfloor sheets, to level out the surface, remove any imperfections, rise or falls in your subfloor.
Vinyl flooring will show up any imperfections and changes in the subfloor, so if you are not able to get a perfectly level and clean surface with your existing subfloor we recommend that you install subfloor sheets to level out the imperfections.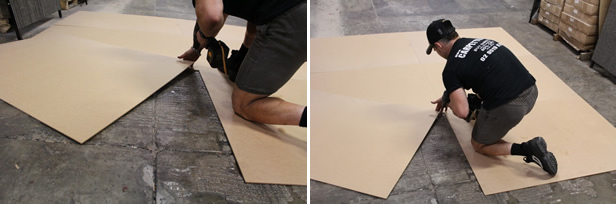
Fill any imperfections. We do stock self- leveller if you need it to help level and fill faults with your under-floor surface.


Step 2
Now you have sub-floor that is ready for installation, you can start unpacking your planks.


Step3
Laying The Planks - Plank Method

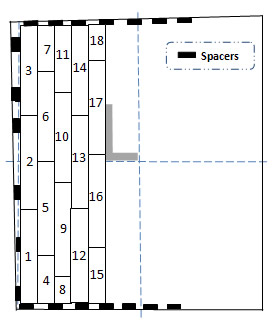
Lay each row of planks to ensure that the joins do not match previous rows nearby. The idea here is to create a random pattern where planks join at random places just like normal wood planks. Offset by at least 15cm to create a stepped or staggered look. Where a room is not perfectly square, this method is also great to disguise the problem. Planks can be offset by varying amounts to create different looks, for example offset by half, a third, or a quarter of a plank. The whole point is to mimic the look of floorboards. Just remember to always have at least 15cm of plank at each end of each row, 15 cm from joins surrounding your current plank joint, and plan out the width of your room so that both sides of the room have at least 7cm of plank width along the walls. This is to add stability to cut rows and planks and also to provide a move visually pleasing look to the room.

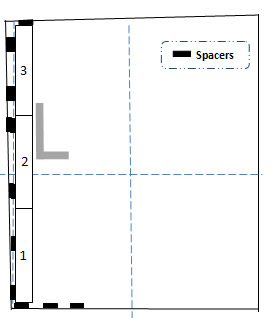
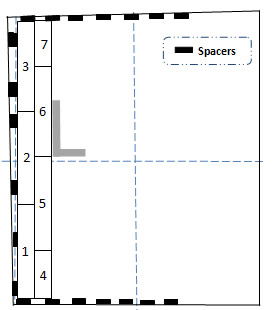
Find and Mark the middle of the room.
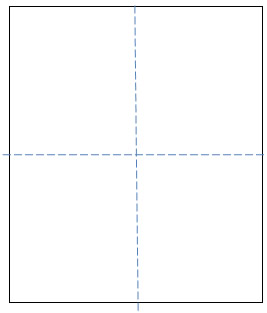
Squaring up your guide lines

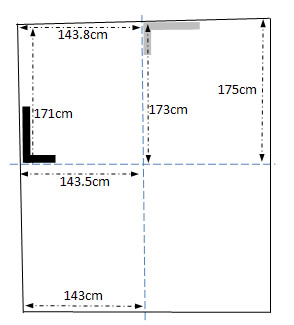
Pick the opposite walls where the length of the walls is the closest, and use the chalk line from the centre of those walls to be your starting point. Now that we know the centre point of that line ( from the step above ) measure back up that line 40cm on each side of the centre point. From each of these points 40cm off centre, measure out 50cm and mark a small curve at 50cm from each of these points. Next measure 30cm each side of the centre point and mark a small curve at 30cm from the centre point. Finally line your chalk line to mark a straight line from one wall through the point where the three arcs meet, then through the centre point on the middle line, then through the other meeting point of the arcs on the other side, and finally out to the wall on the other side.If done correctly, these lines will now be square and you are ready to progress to the next step.
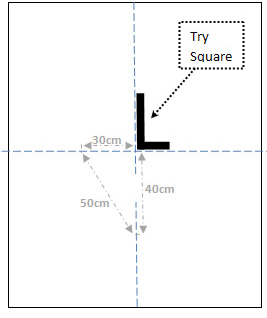
If you have your try square, place the point of it at the centre point where the lines cross. Mark out the points each side from the end of the other arm of the try square. Do the same measuring the other side of the centre line. Using your chalk line to then mark lines that go straight through the centre point where the lines cross and through the point where your points each side were marked using the try square and extend the new chalk line out to the walls each side. If done correctly, these lines will now be square and you are ready to progress to the next step.
What to do when your room is not Square.

DO NOT FORGET!
THESE FLOATING VINYL CLICK & LOCK PLANKS REQUIRE A
5 to 8mm EXPANSION SPACE
AROUND THE OUTSIDE OF THE FLOOR TO ALLOW FOR EXPANSION IN WARMER TEMPERATURES.
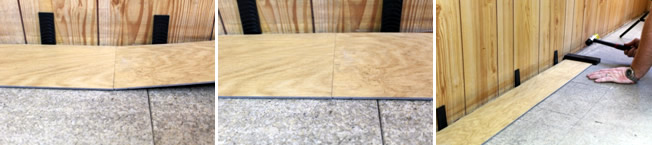
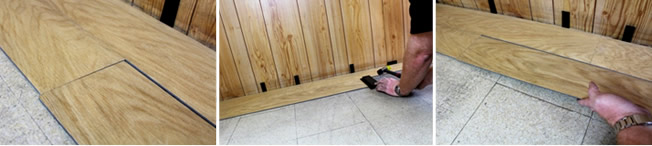
When we are installing the flooring, make sure you use spacers between the walls and the edge of the planks, and that any trimmed planks allow for this space.
If you do not have off the shelf spacers, you can use offcuts of the Vinyl CLICK & LOCK Planks as they are 5mm thick.
Cutting an offcut piece of plank into small rectangular strips approximately 3cm X 5cm will give you perfect spacer strips to ensure adequate expansion joins between walls/Skirtings and your Vinyl CLICK & LOCK Planks.
Be careful not to damage
The Planks are designed with profiles built into the edges to allow them to interlock. They have been engineered to lock together and maintain their connections when installed. The flooring will naturally expand and contract from room conditions, hence the expansion space required around them. They should however remain clicked together tight during expansion. Be extremely careful when handling planks, stacking them and transporting them. Impacts to the engineered edge can prevent the planks from properly locking together. Make sure that you protect the edges when moving planks around your installation, unpacking them, or transporting them. You can trim around damage, or clean out the damaged area to allow the planks to lock together correctly There are several different methods to installing these planks and which long edge should be against your starting wall. In our case we use the method where the tongue ( the underfloor protruding piece) is closest to the start wall, leaving the overhang facing towards the room for attaching to the next plank. There is no right or wrong it's a case of personal preference. Our installers simply find the above method to be easier when starting off.

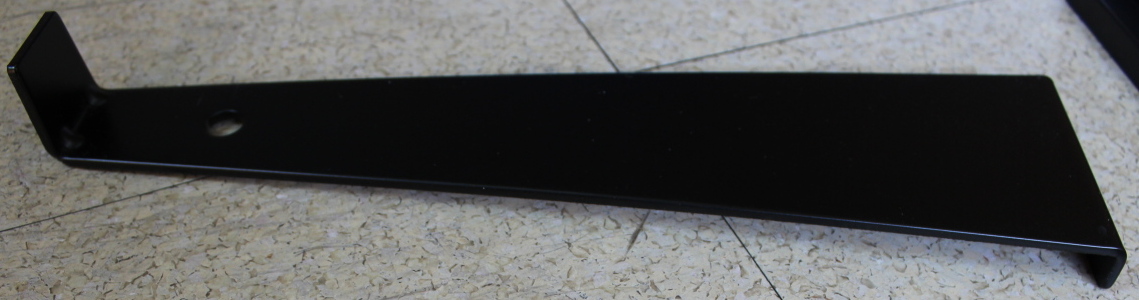
Installation is dramatically easier when using the right tools.
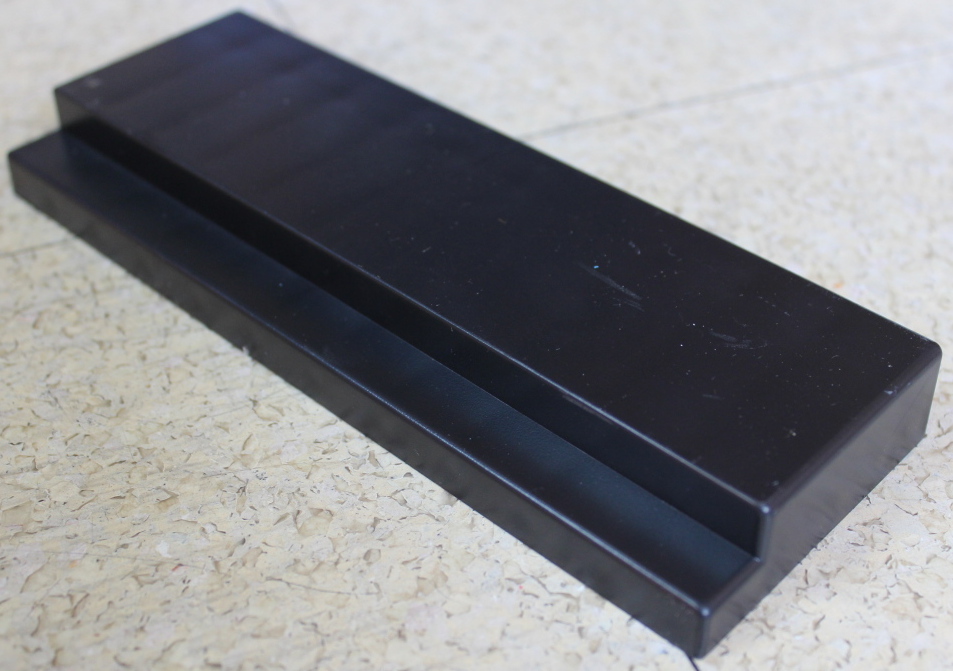
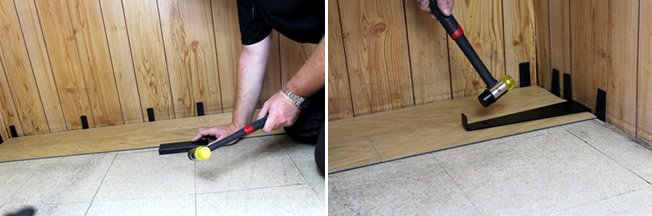
Tap Block – Used between the soft-faced hammer and the engineered edge. Tapped gently this lets you ease the flooring snug to the surrounding pieces.
Spacers. – These particular ones allow us to put two facing together and vary the width along walls to make sure we remain straight. You can also use offcuts of planks.
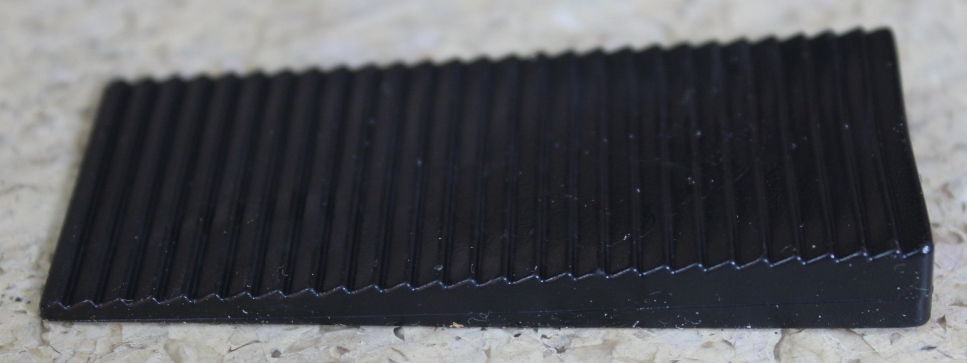
Spacers. – These particular ones allow us to put two facing together and vary the width along walls to make sure we remain straight. You can also use offcuts of planks.
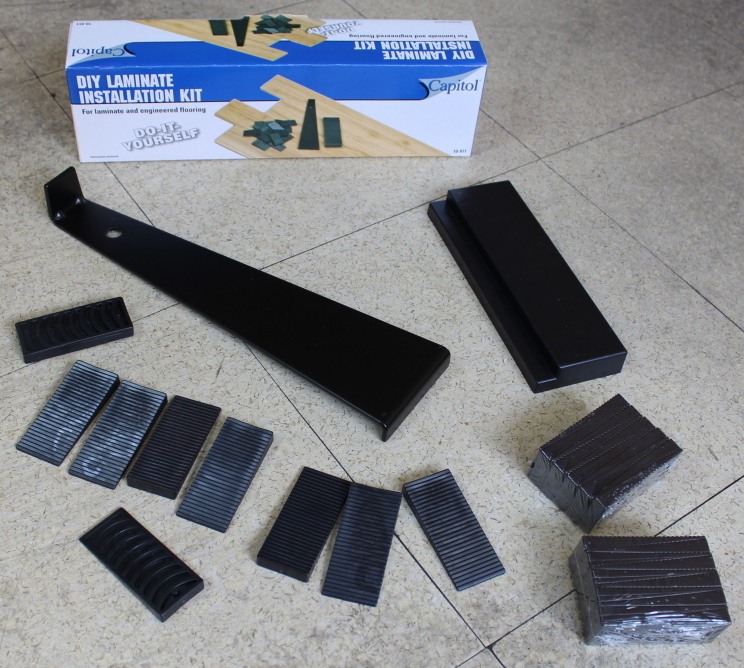
Off the shelf Engineered Flooring Laminate flooring kit.
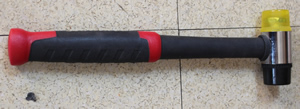
Soft-Faced Hammer. – This eases the impact when hitting the Tap Block / or Pull Tool, and absorbs part of the impact. This makes it easier to install the flooring without damaging the edge. Given that you are not hitting the CLICK & LOCK Planks directly
Facing the long wall you are starting with, place spacers against the wall and then line your CLICK & LOCK Plank up against them


Finishing up.
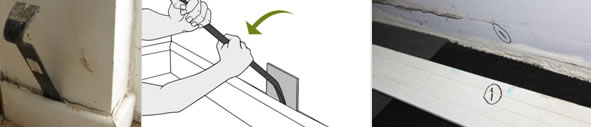
Now you have your floor down, carefully remove the spacers from one wall, and then attach the Skirting or Scotia to the wall covering the expansion gap. Work your way around all the walls cutting and reattaching the Skirting or Scotia. Where you need to join between your new flooring, and existing floor in different room, or over an expansion gap, use metal Coverstrips to make the transition. If you have stairs that leave off from your VinylCLICK & LOCK Planks, attach stairnosings to the leading edge of the stairs to provide protection and ensure appropriate grip on your stairs.Cutting yourplanks to walls and obstacles.
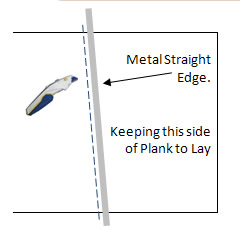
Where you need to cut your planks to fit between walls and the remaining planks, or around obstacles in the room it is best to "measure twice cut once". Remember to make sure that you take care to ensure you allow space for expansion, so always allow 5mm between the edge of the planks and any wall or obstacle. Remember that you measure the top layer of the plank only, do not include the tongue of the plank as this inserts to the preceding plank.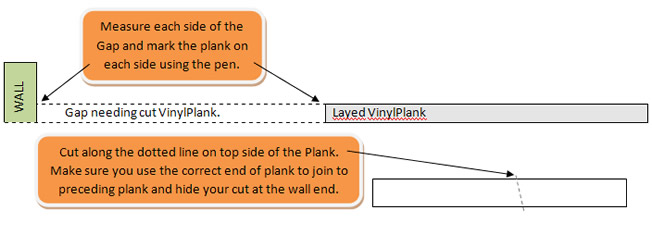
Roll / Mallet the Seams and Joints of the Vinyl CLICK & LOCK Planks( Optional ).
As a final step, consider using a roller or rubber mallet to bed the vinyl planks down into the glue. Rollers can be hired from most equipment hire businesses for reasonable prices, of you can buy small hand rollers at most hardware stores, and use your body weight to apply pressure when rolling seams. This will ensure that your Vinyl CLICK & LOCK Planks properly bond together, and remain in place for years to come.